Environment Setup
Before we start learning Python, we need to setup our environment to help us build our programs. There are many ways in which you can setup a Python environment. For application development, the popular integrated development environments (IDE) are PyCharm, Eclipse, IDLE etc. However since we are focused on using Python for Data Analytics, we will install Anaconda which is by far the most popular computing environment for Exploratory Data Analytics.
What is Anaconda
Anaconda is an open source, Python and R distribution containing 100's of packages which includes open source libraries, IDE's like Jupyter and Spyder, along with Conda. Conda is a package and environment manager which makes it easy to download and use popular open source libraries curated by Anaconda team. Conda makes it seamless to not only install but also maintain (updates to newer versions when available) all your packages including Python. Anaconda aims to provide everything you need for data science as one single download.
Installation
Download Anaconda by visiting the Anaconda website: https://www.anaconda.com/download. Choose Python 3. ( = whichever is the latest, 7 as of this book writing) version. This software requires a minimum of ~ 2 GB disk space.
Steps

To educate yourself scroll through the screen to have a cursory glance at all the packages being installed.

Click Continue to accept the terms and install by selecting Continue on all the remaining steps

Once installed, Anaconda Navigator can be invoked like so:
- In mac - by clicking on Anaconda-navigator present in Applications folder
- In Windows - open command prompt and type in anaconda-navigator. Command prompt can be opened by pressing Win + R and then type cmd.
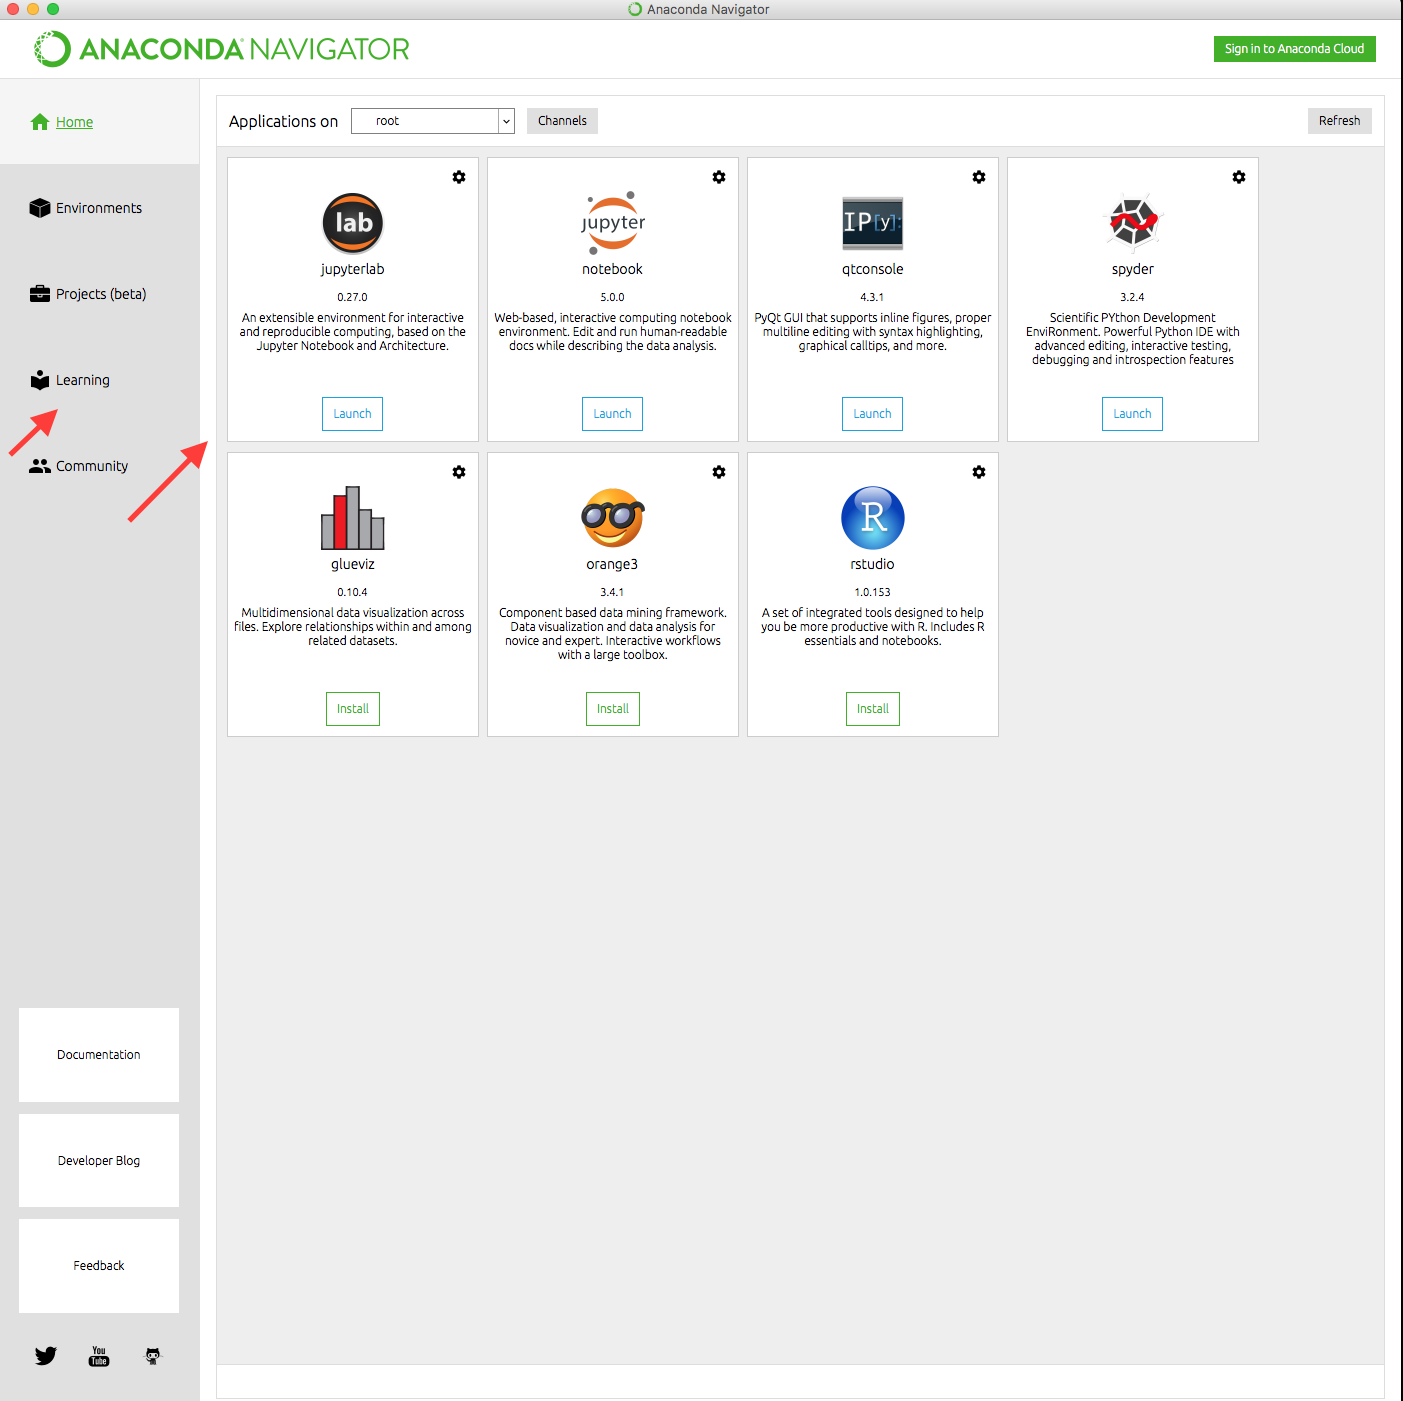
Once you start Anaconda Navigator you see the below screen

Anaconda Navigator provides quick links to all the main applications along with references to rich learning resources, developer blogs etc. It is a good idea to select each one of them and have an over all understanding of resources on hand.
The two pointers shown in the image above are of higher importance as we will be using JupyterLab in this book and the Learning reference has pointers to rich online resources - all in one page, which could supplement this book.
Trouble shooting
All though the installation is a simple process as described above, in all the operating systems, sometimes you may encounter issues. Your first stop could be to visit the Anaconda Navigator documentation page - https://docs.anaconda.com/anaconda/user-guide/troubleshooting.
In addition, Stackoverflow (https://stackoverflow.com/questions/tagged/anaconda) has a tag for Anaconda and it should be your second stop, as required, to see if anyone else has encountered similar issues as yours.
If you are seeing an exception or error, then first try entering the exact same exception or error into the search box to get results for possible solutions.Finally, although JupyterLab is way better compared to Jupyter Notebook with many useful features, it is still in Beta and hence may not work in all operating systems. If you encounter issues with starting JupyterLab, you can work with Jupyter Notebook instead. To invoke Jupyter Notebook select Jupyter Notebook card in Anaconda Navigator. Beware however, that all the screenshots in this book are from JupyterLab and you will see some small variations if you work with Jupyter.